Sparkle Crafts: Simple Paper Kite
A Scottish hare, two badgers, and a red kite deliver a message about gratitude in The Willowbee Tree audio story “Graces,” which is what inspired this Simple Paper Kite craft and activity!
It’s been HOT this summer (like, record-breaking hot here in the northern hemisphere), but over the last few weeks the temps have cooled down in our neck of the woods and with it has come a beautiful cool breeze – a welcome change! To celebrate this newfound freshness in the air, my son Ollie and I decided to make a little kite of our own and head out on an adventure to our local park (with his lovey, “Cherry” the bear) to soar along with the wind!
This project is great for small and large hands, and produces a well-flying kite in 15 minutes or less.
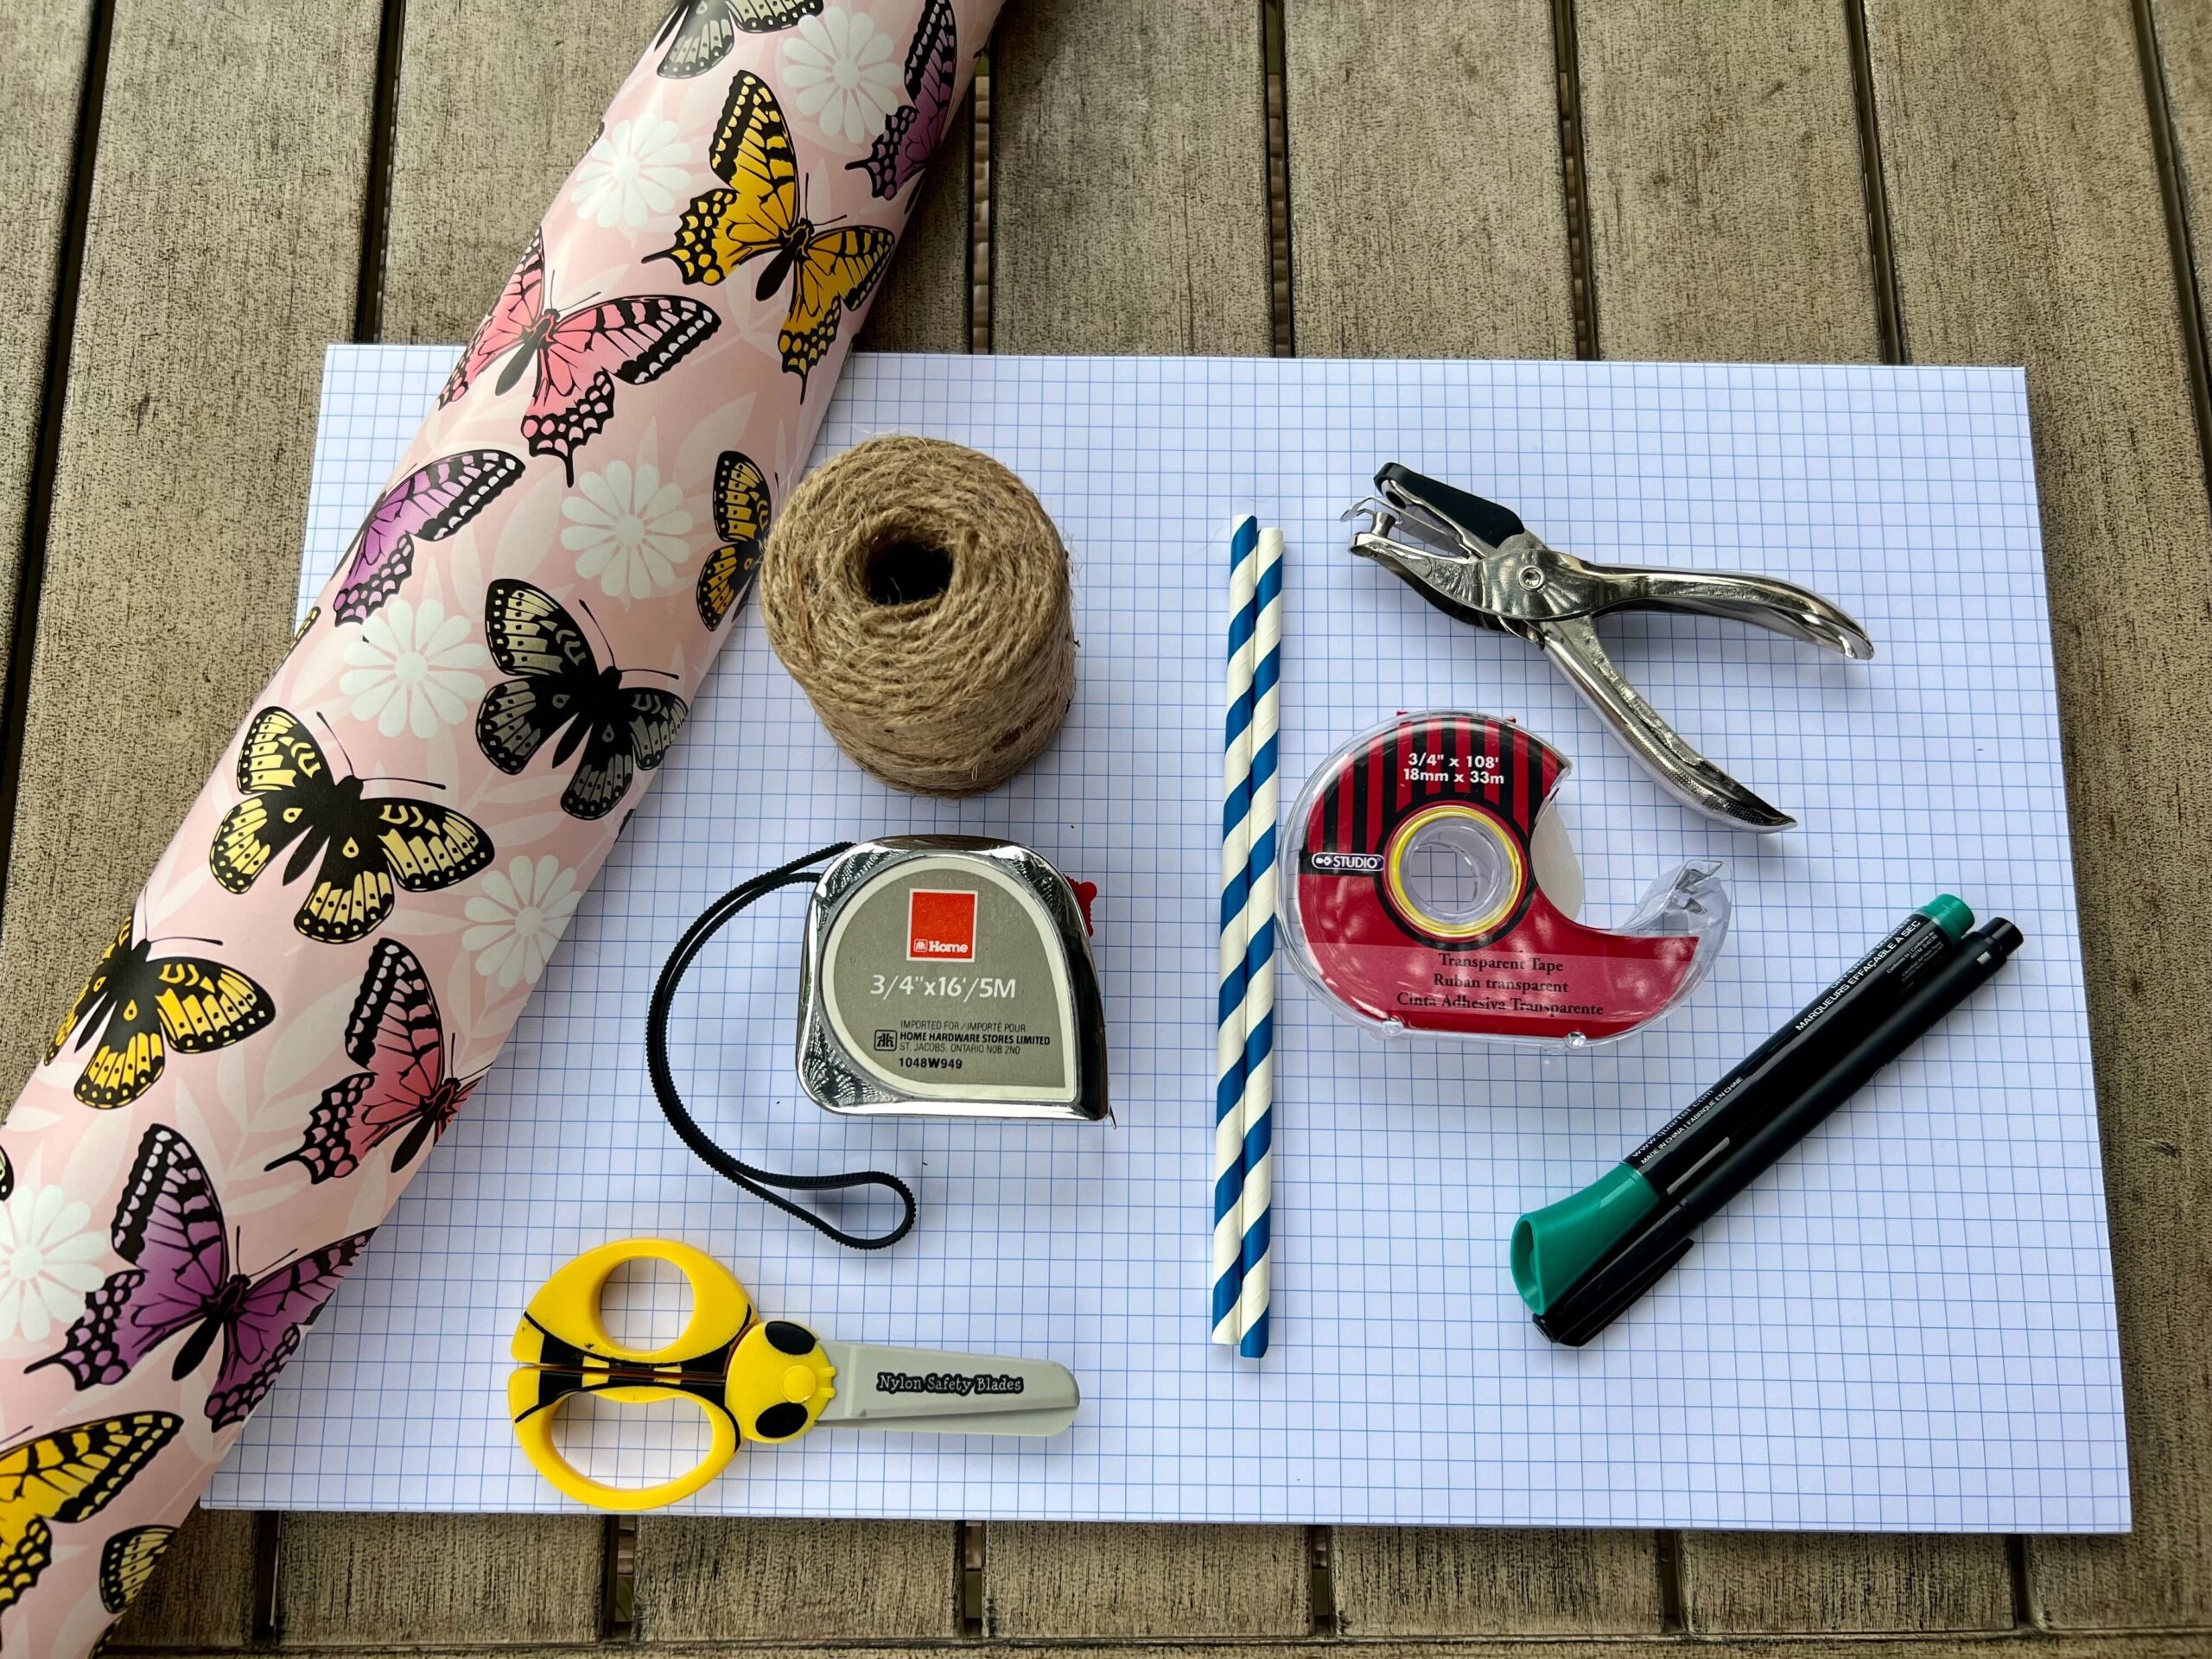
Here’s what you need:
wrapping paper
1″ graph paper for your template (some wrapping paper already has a 1-inch grid on the back)
2 plastic (or paper) drinking straws (not the bendy kind)
tape
hole punch
crochet cotton or kitchen twine cut to 24 inches
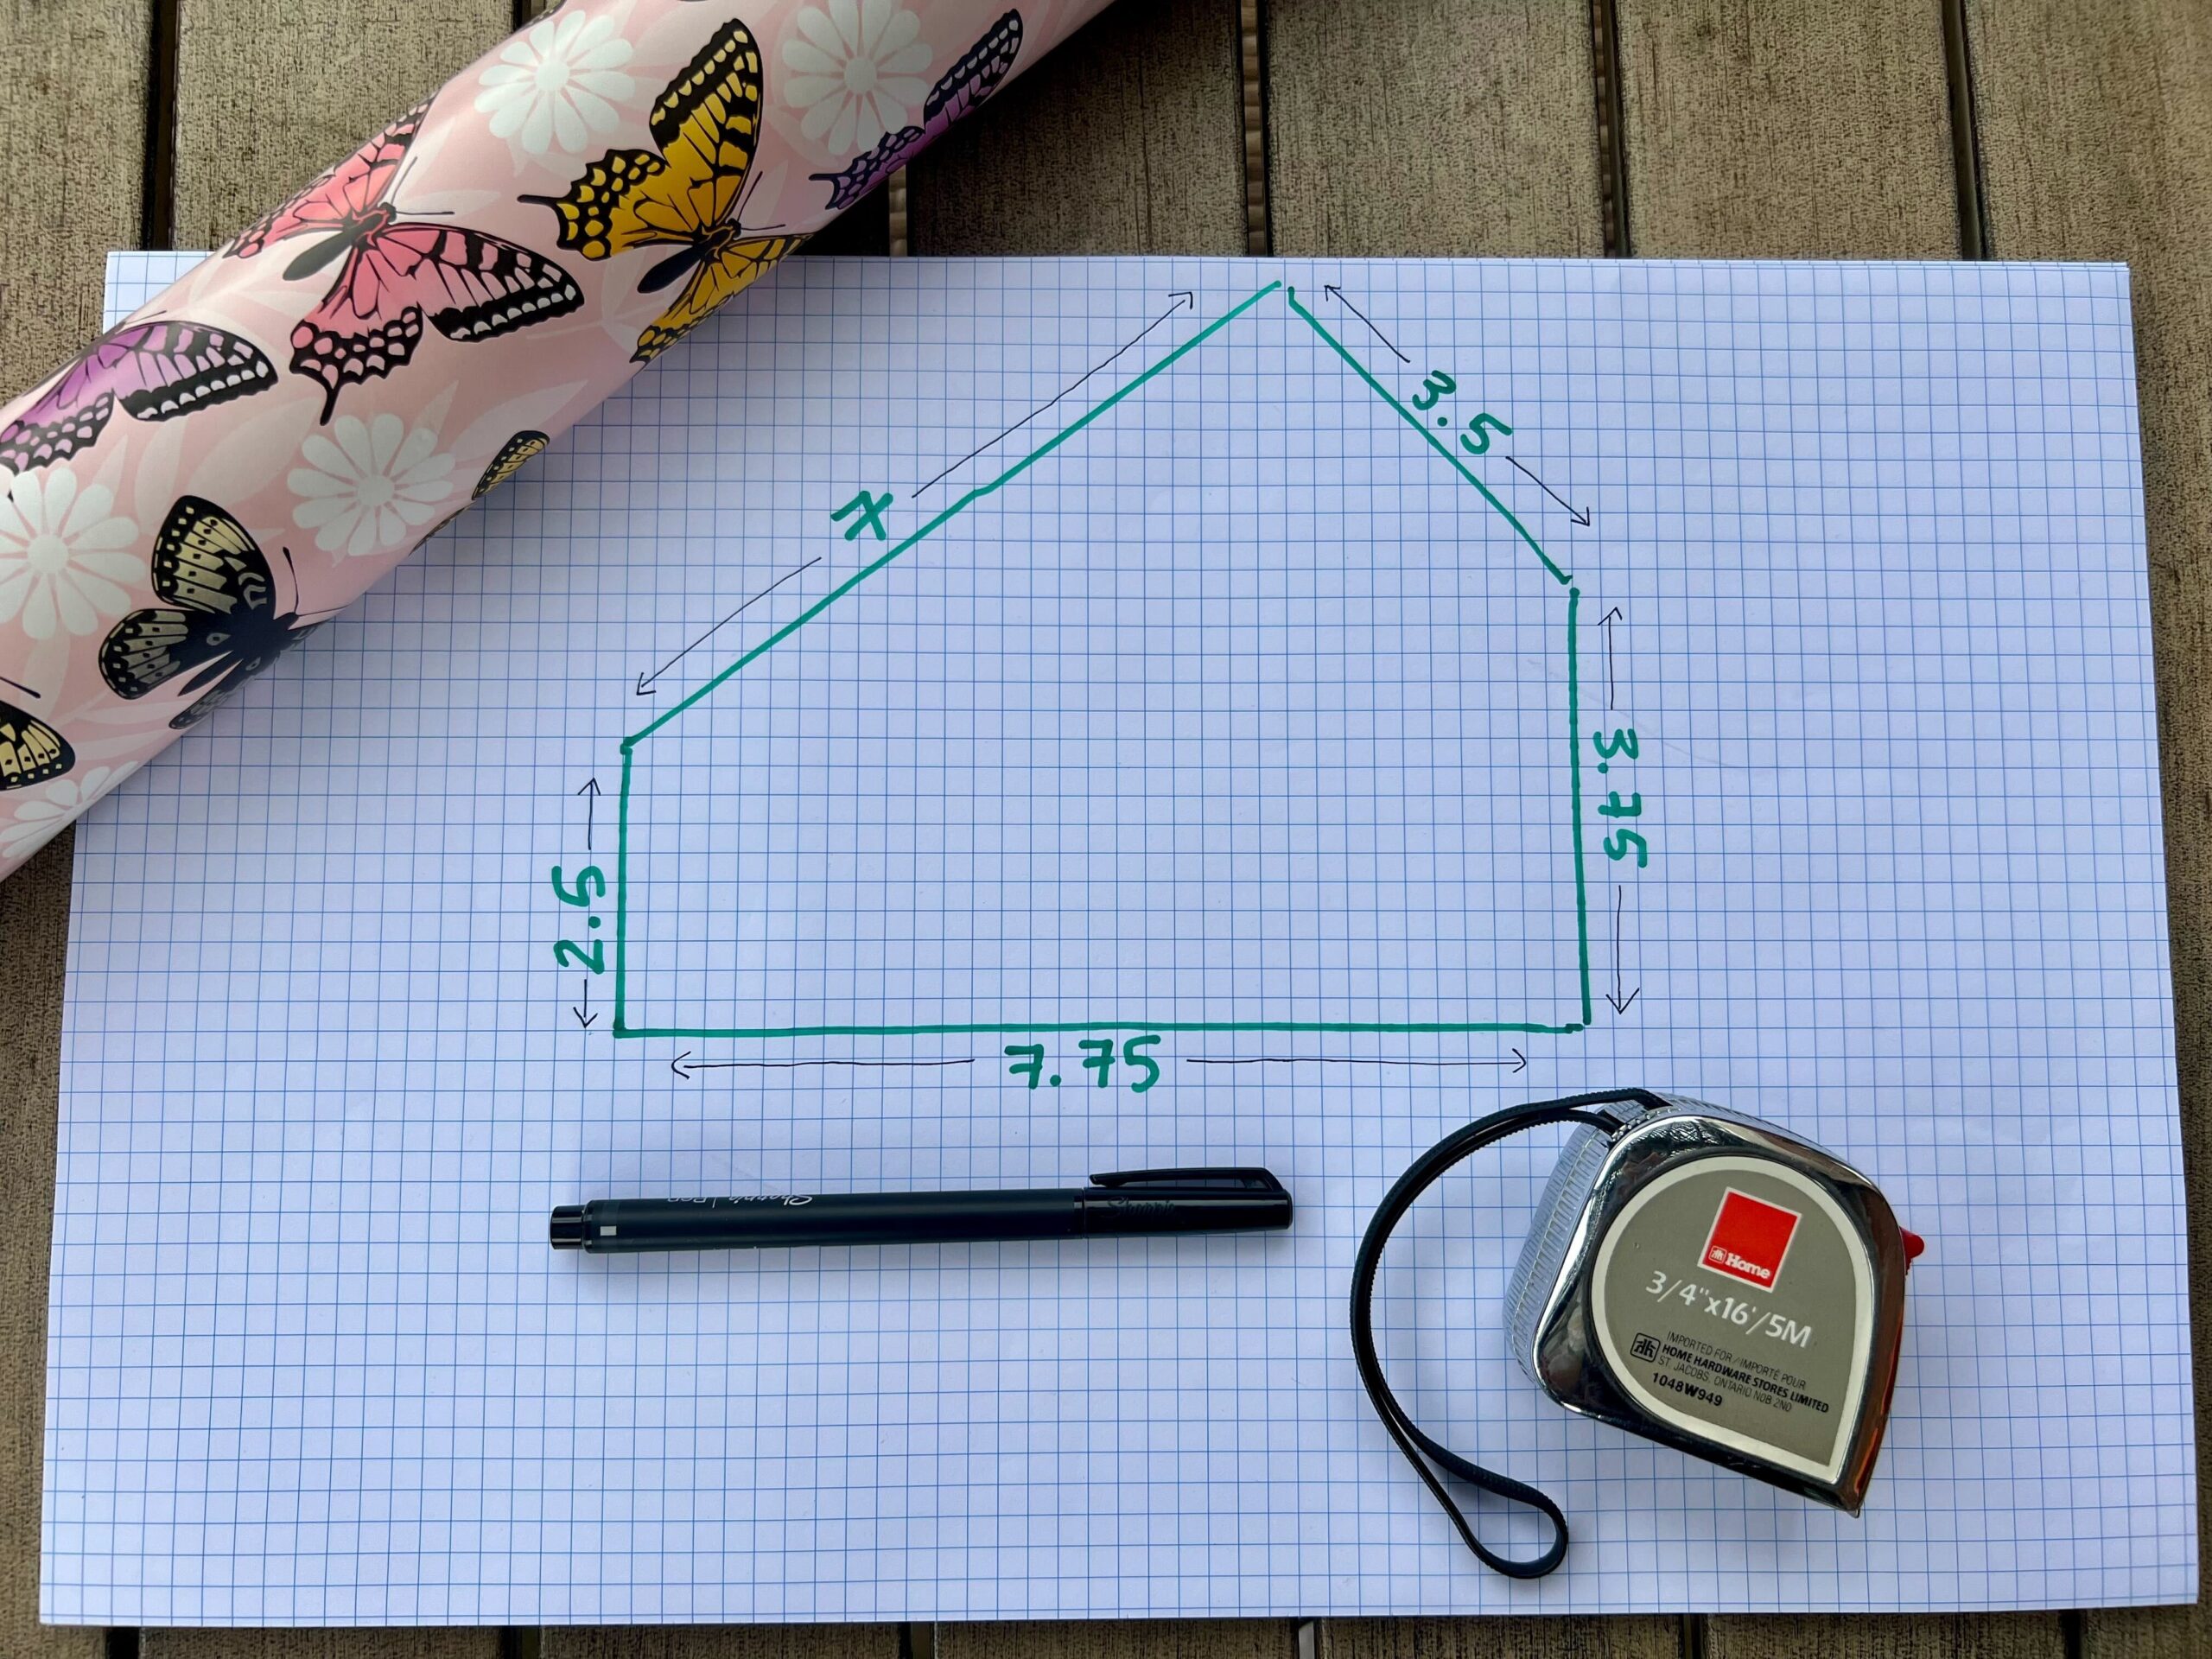
The layout for this kite is like a lopsided house. Using the photo above as an example, start at the edge of a square and draw a line 7.5 inches long. From the left point, draw upwards 2.5 inches, and from the right point, draw upwards 3.75 inches. From the top of each of those points, meet in a position three lines over from the right and seven lines up from the bottom. That was the hardest part!
Fold your wrapping paper in half and position your template so that the 7.5 inch side is on the fold. Cut out your pattern.
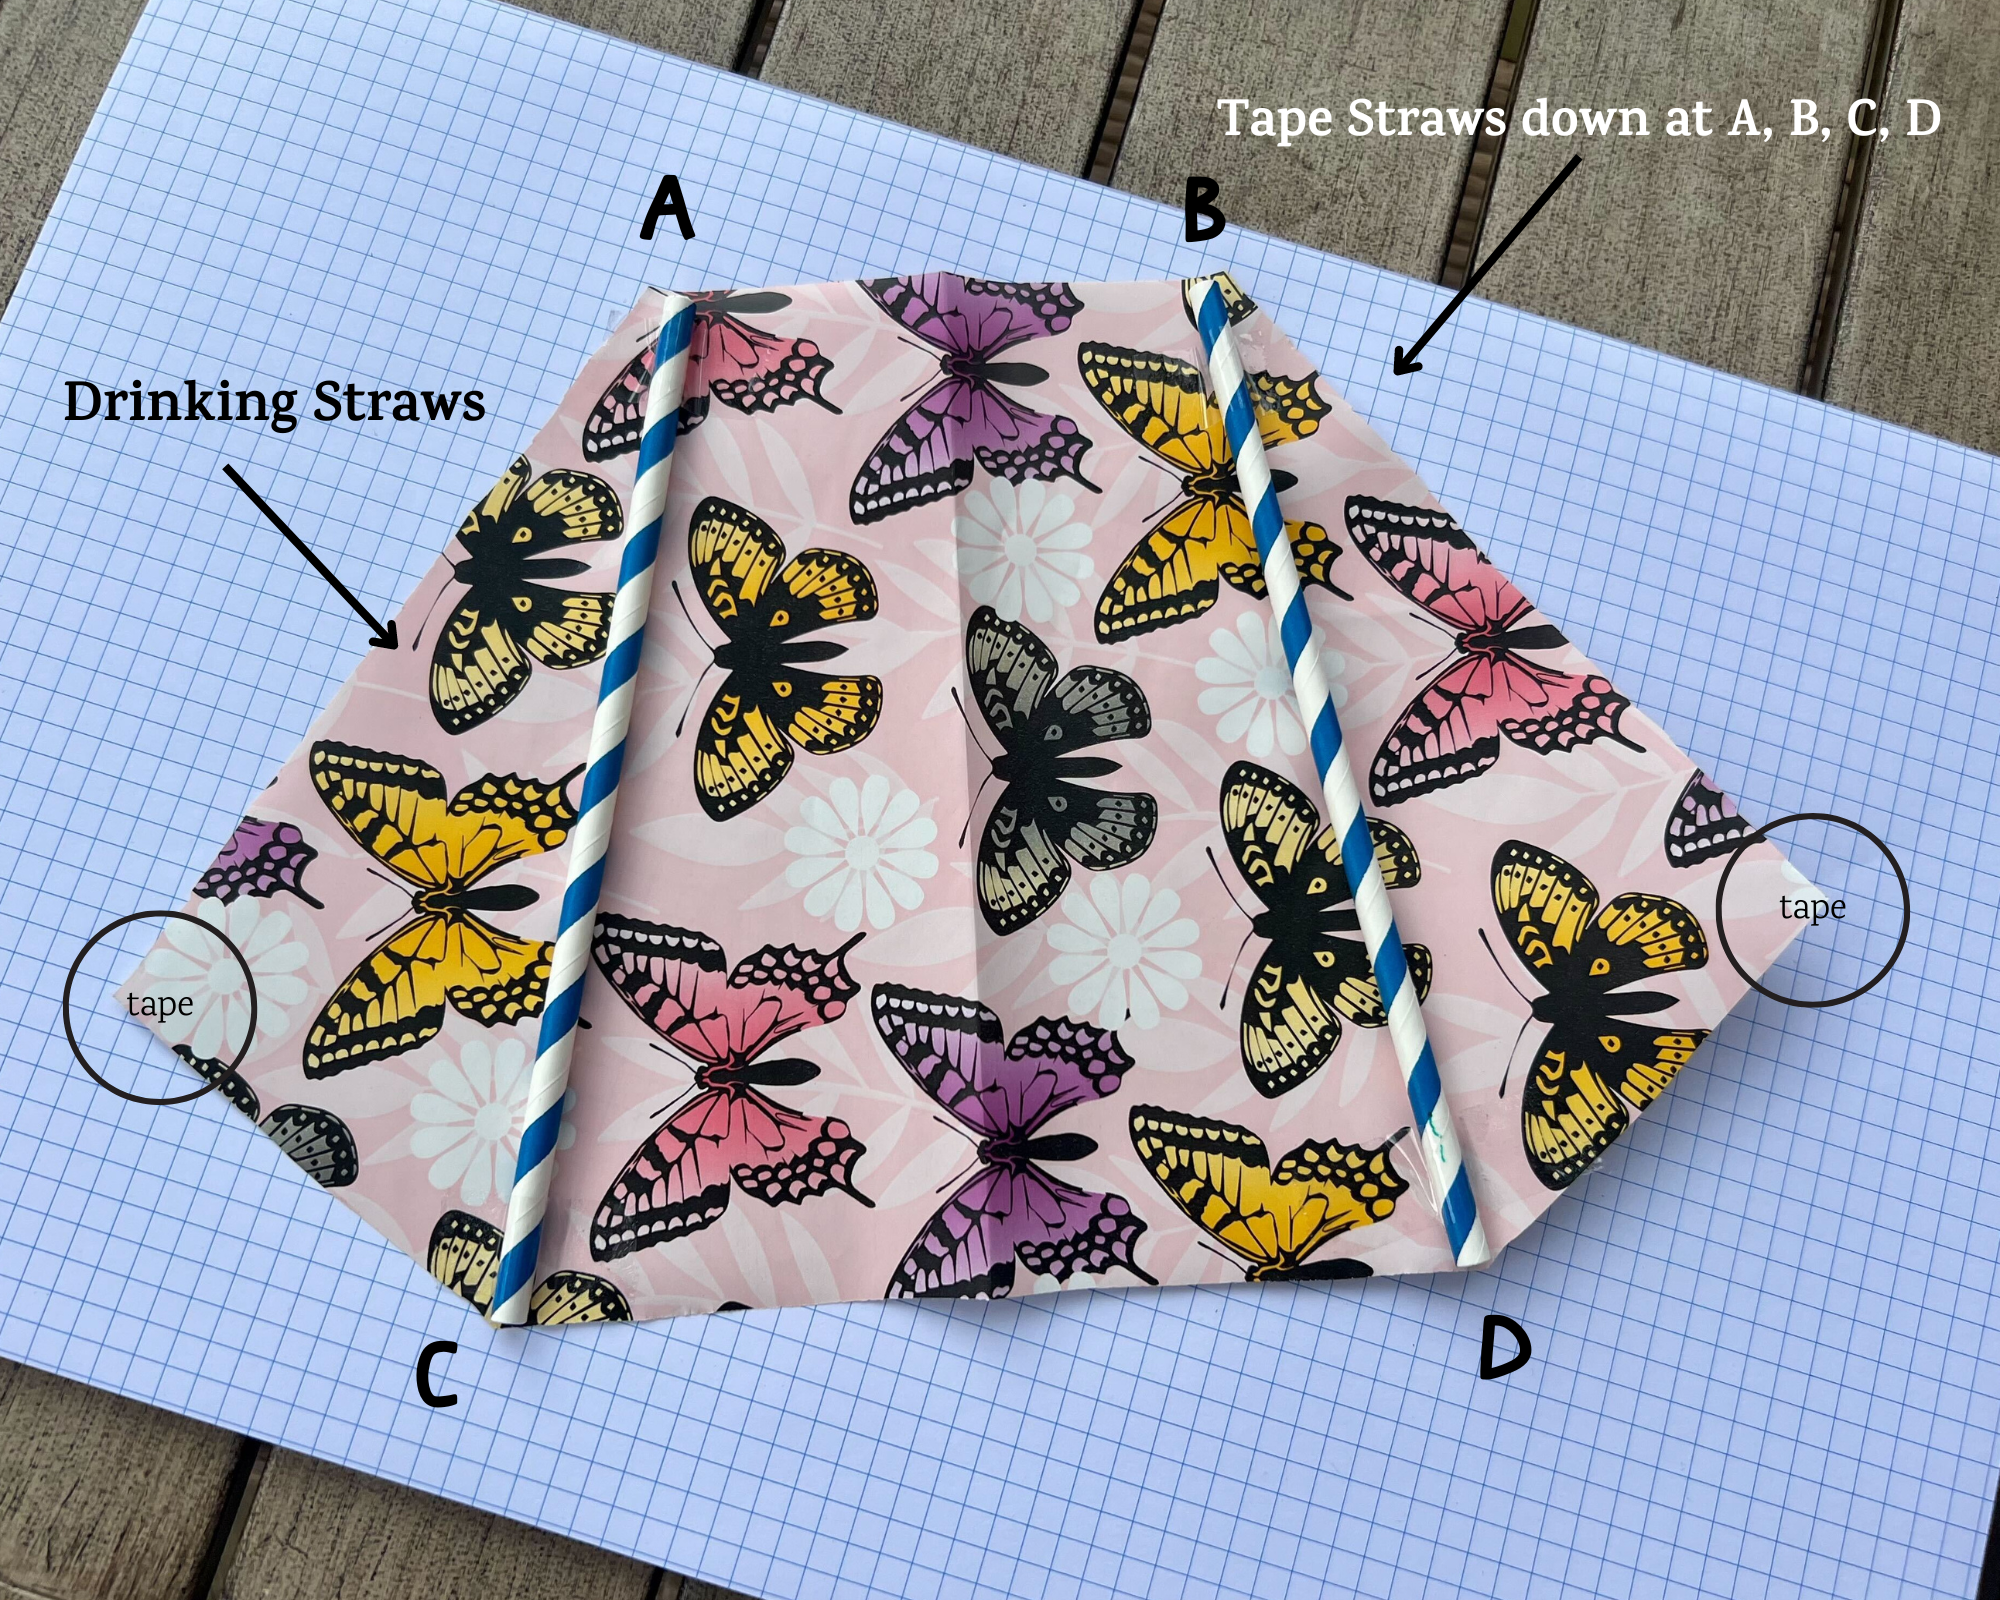
Position your straws with one running from Point A to Point C, and the other running from Point B to Point D. Simply tape them down in place at the ends. A standard size straight drinking straw should fit this space perfectly. Also affix tape to each side corner to reinforce it.
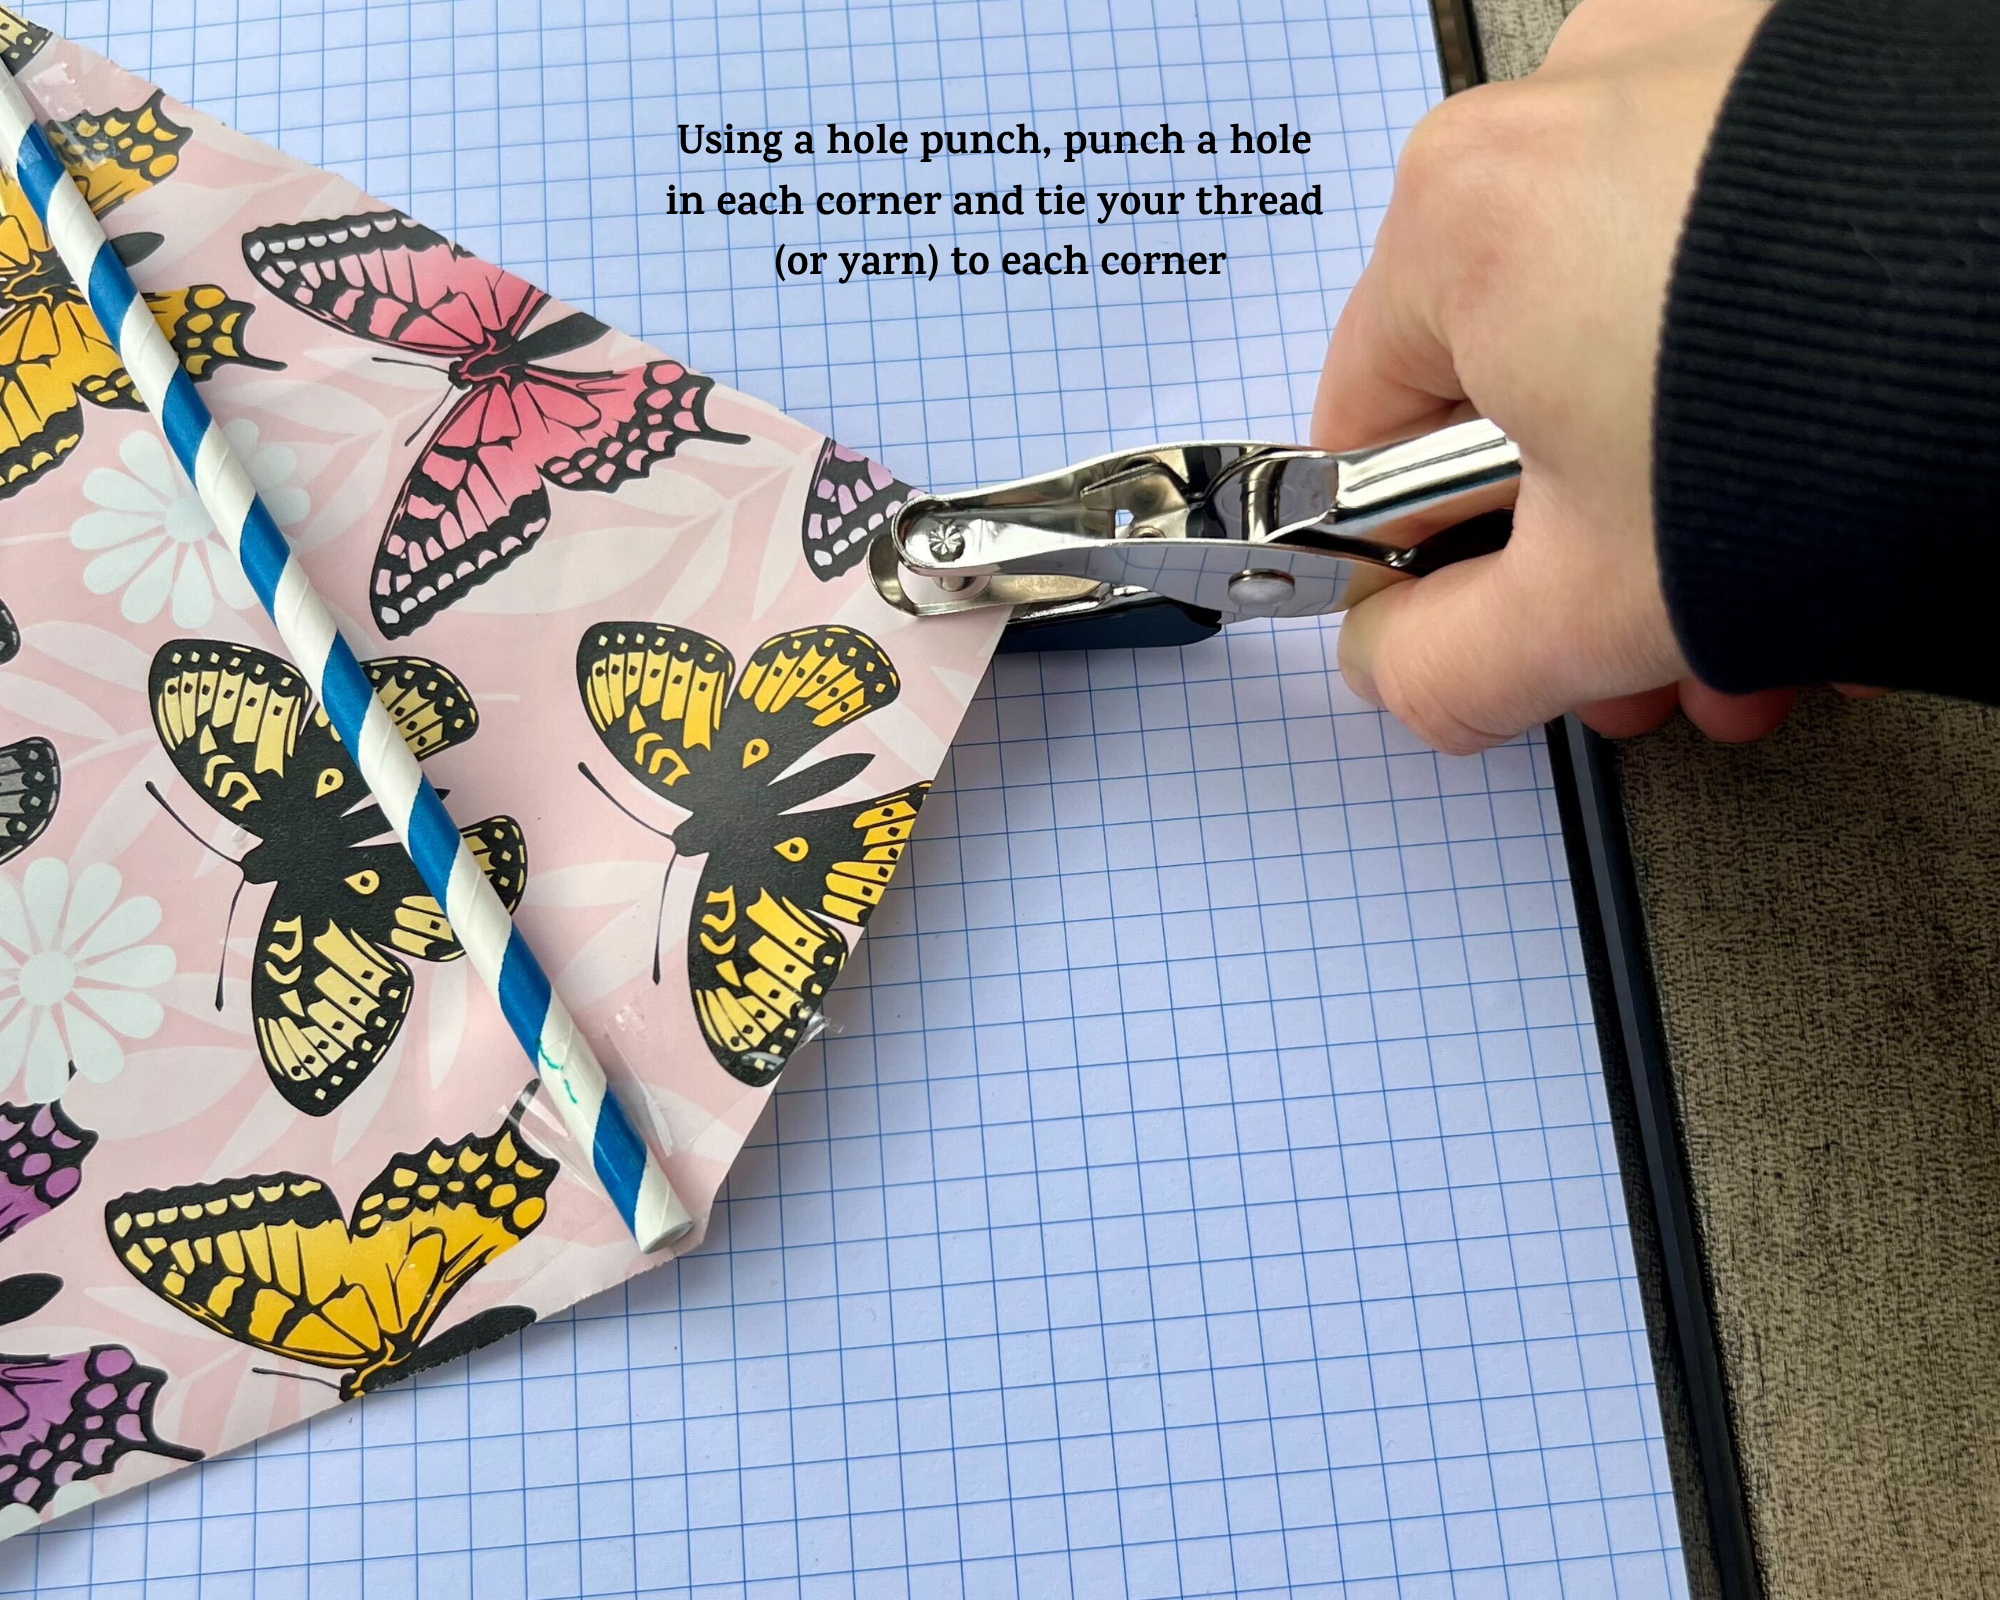
Punch holes in the corners and attach one end of the thread or twine to each corner. Tie a loop in the middle of the length of thread and this is your loop to attach your kite string. If you don’t have kite string on hand, you can just attach a long length of more thread or twine to use as kite string. This kite won’t last for years, so you can just use something you have on hand.
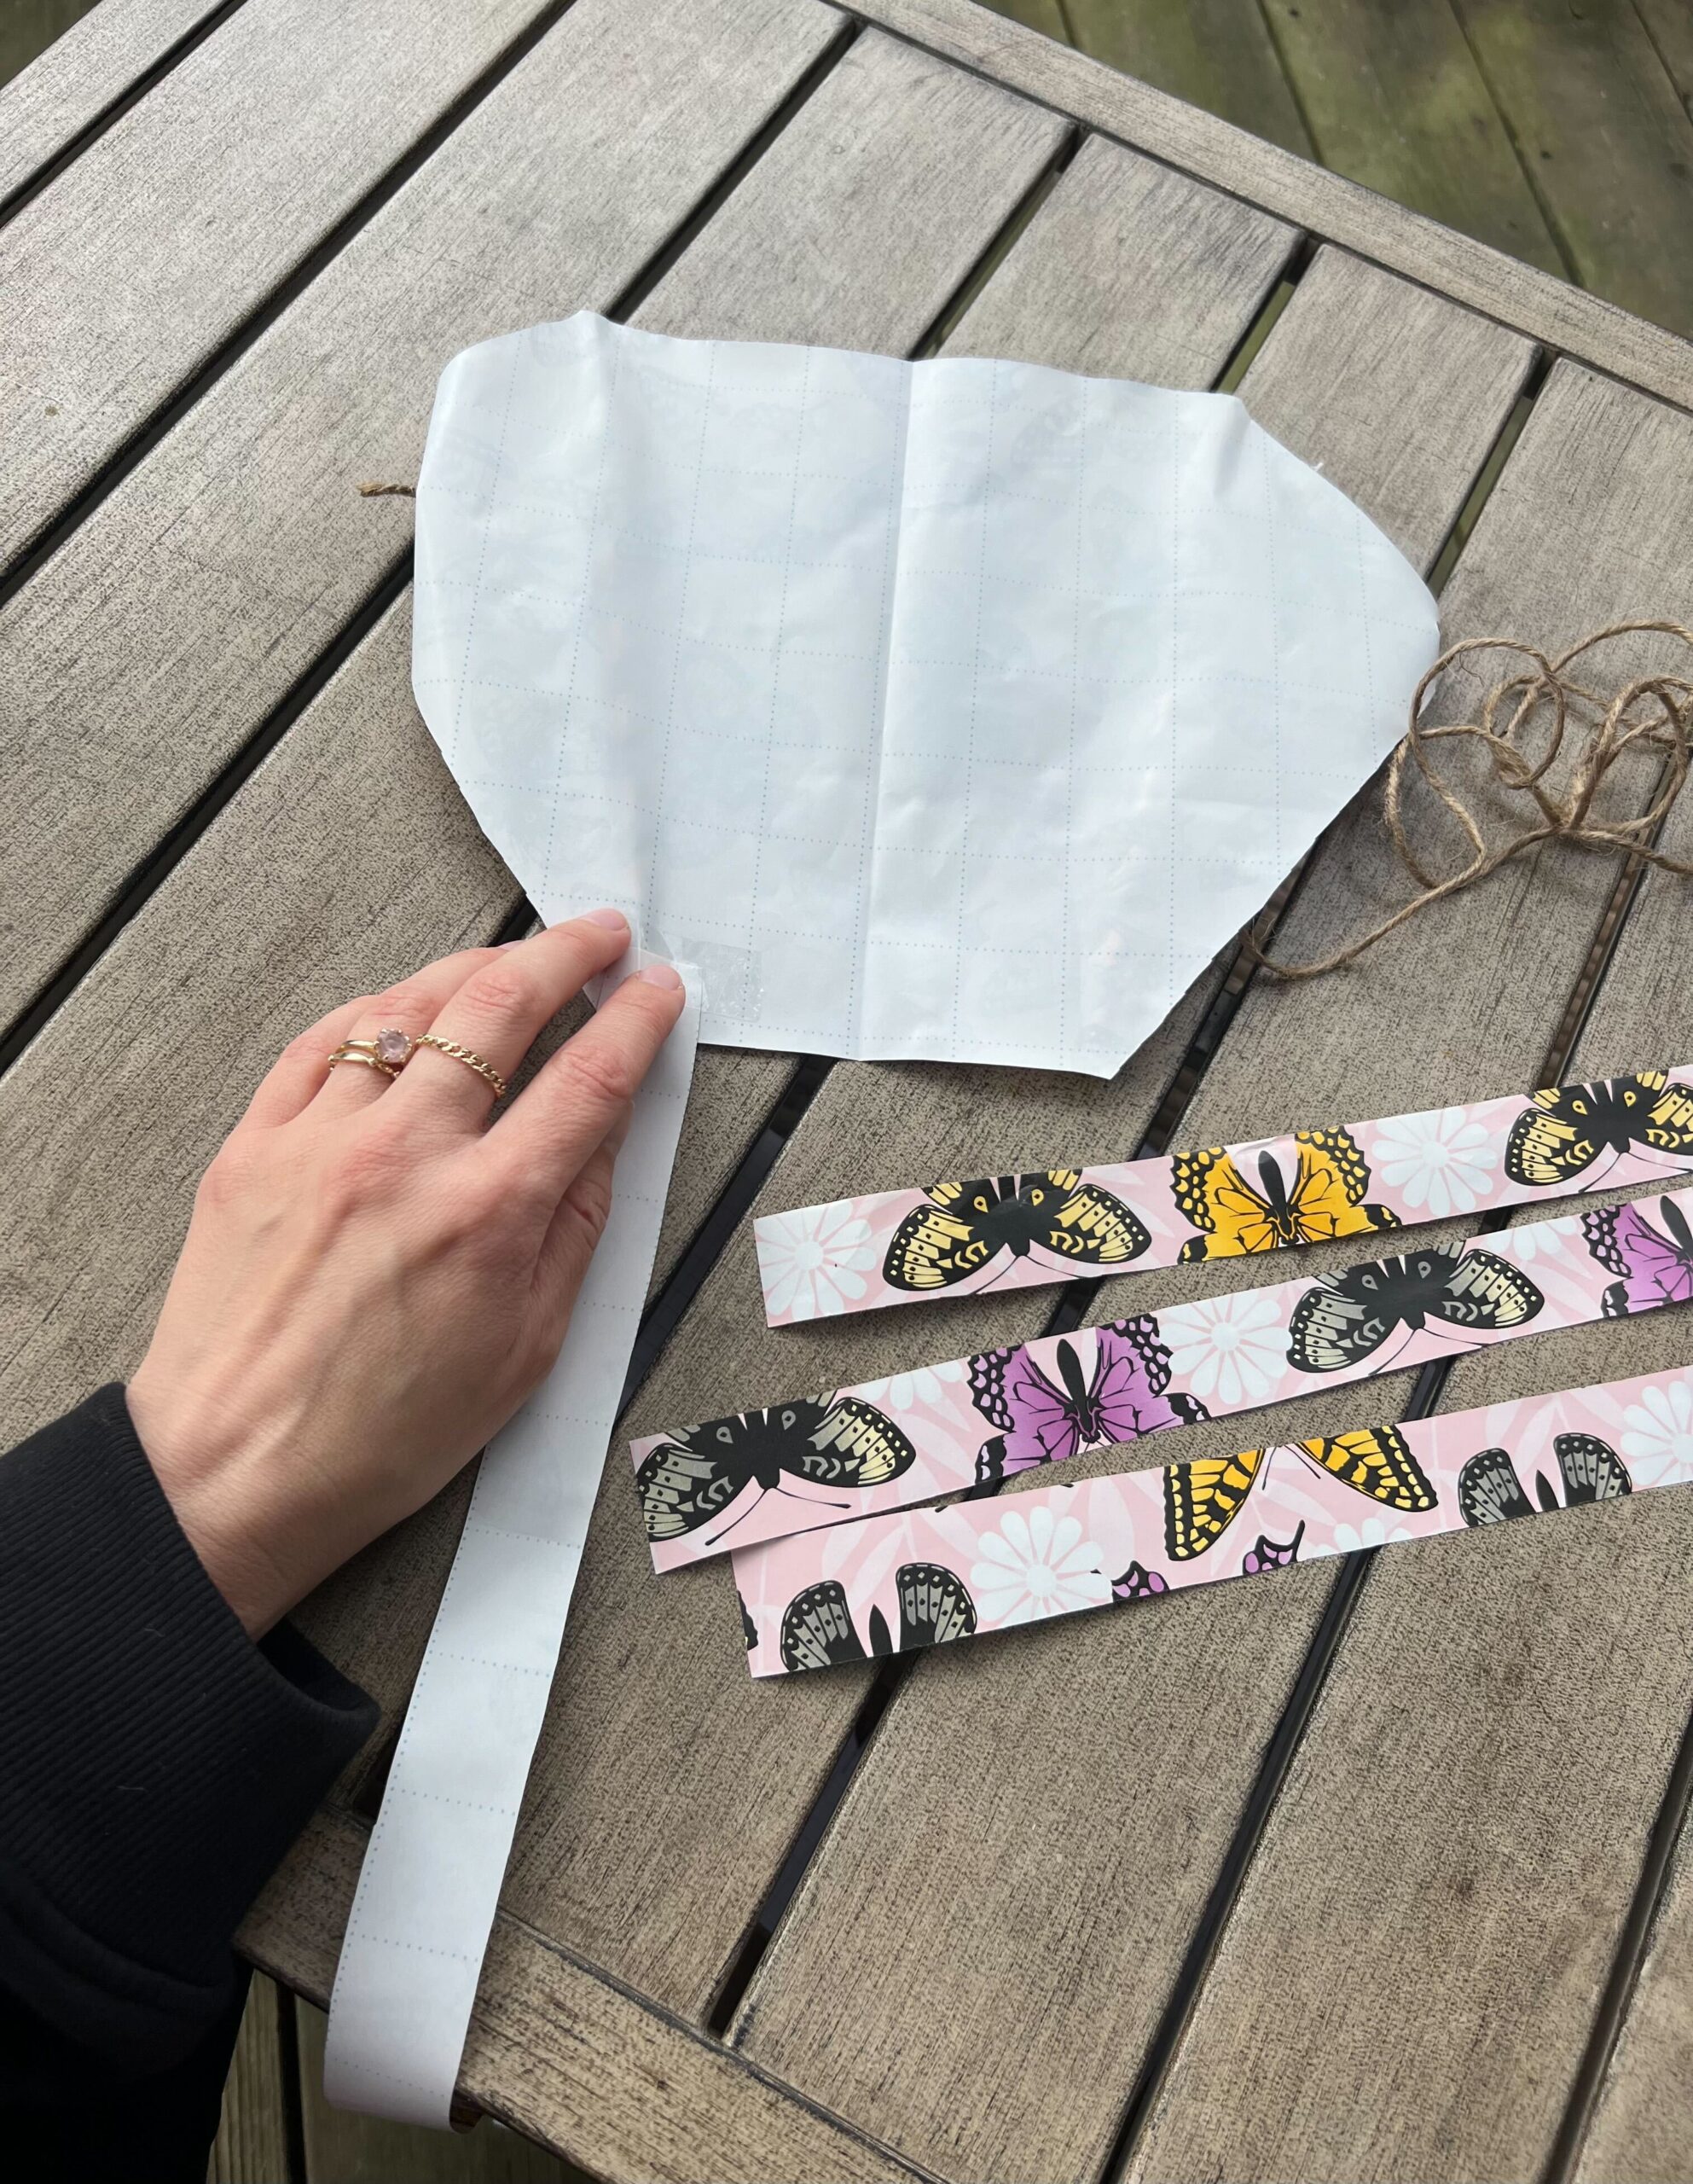
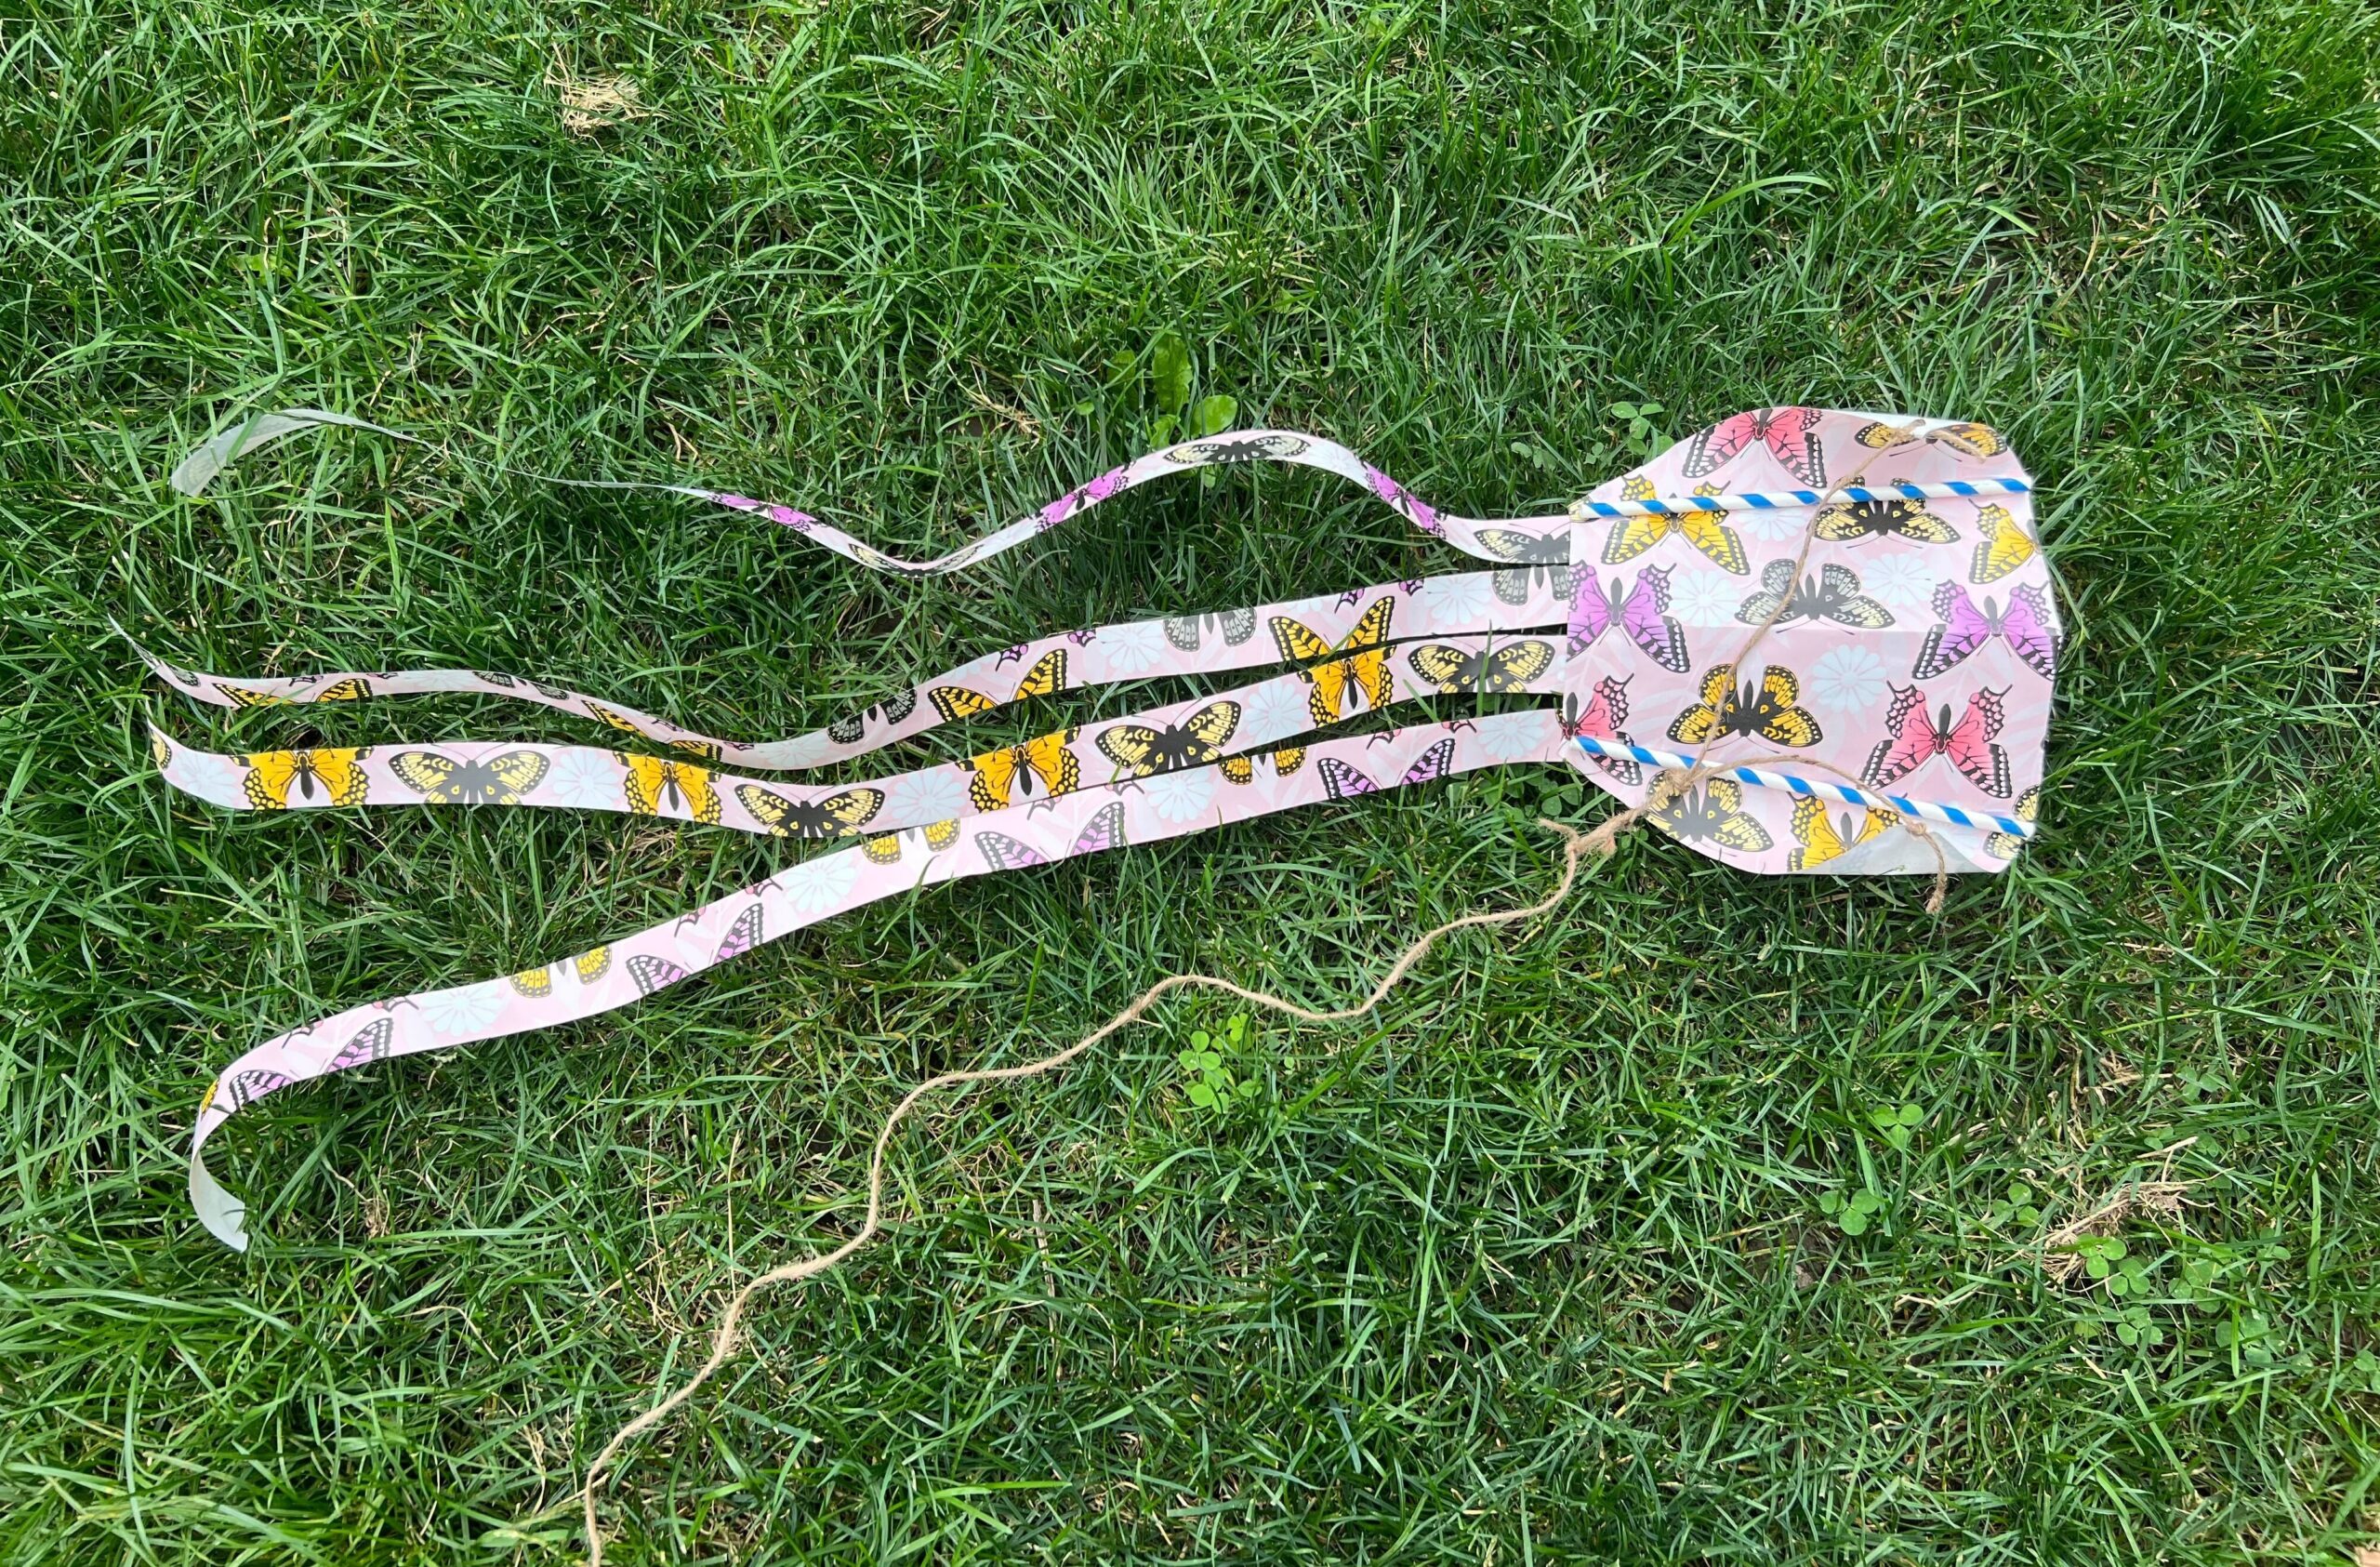
If you have enough paper, tails really make the kite special. On the shorter edge (the back of the kite), attach two 1-inch by 4- or 5-foot tails to either side. We made these out of the same wrapping paper we used for the kite body, but you could use a contrasting color or crepe streamers or anything of similar weight.
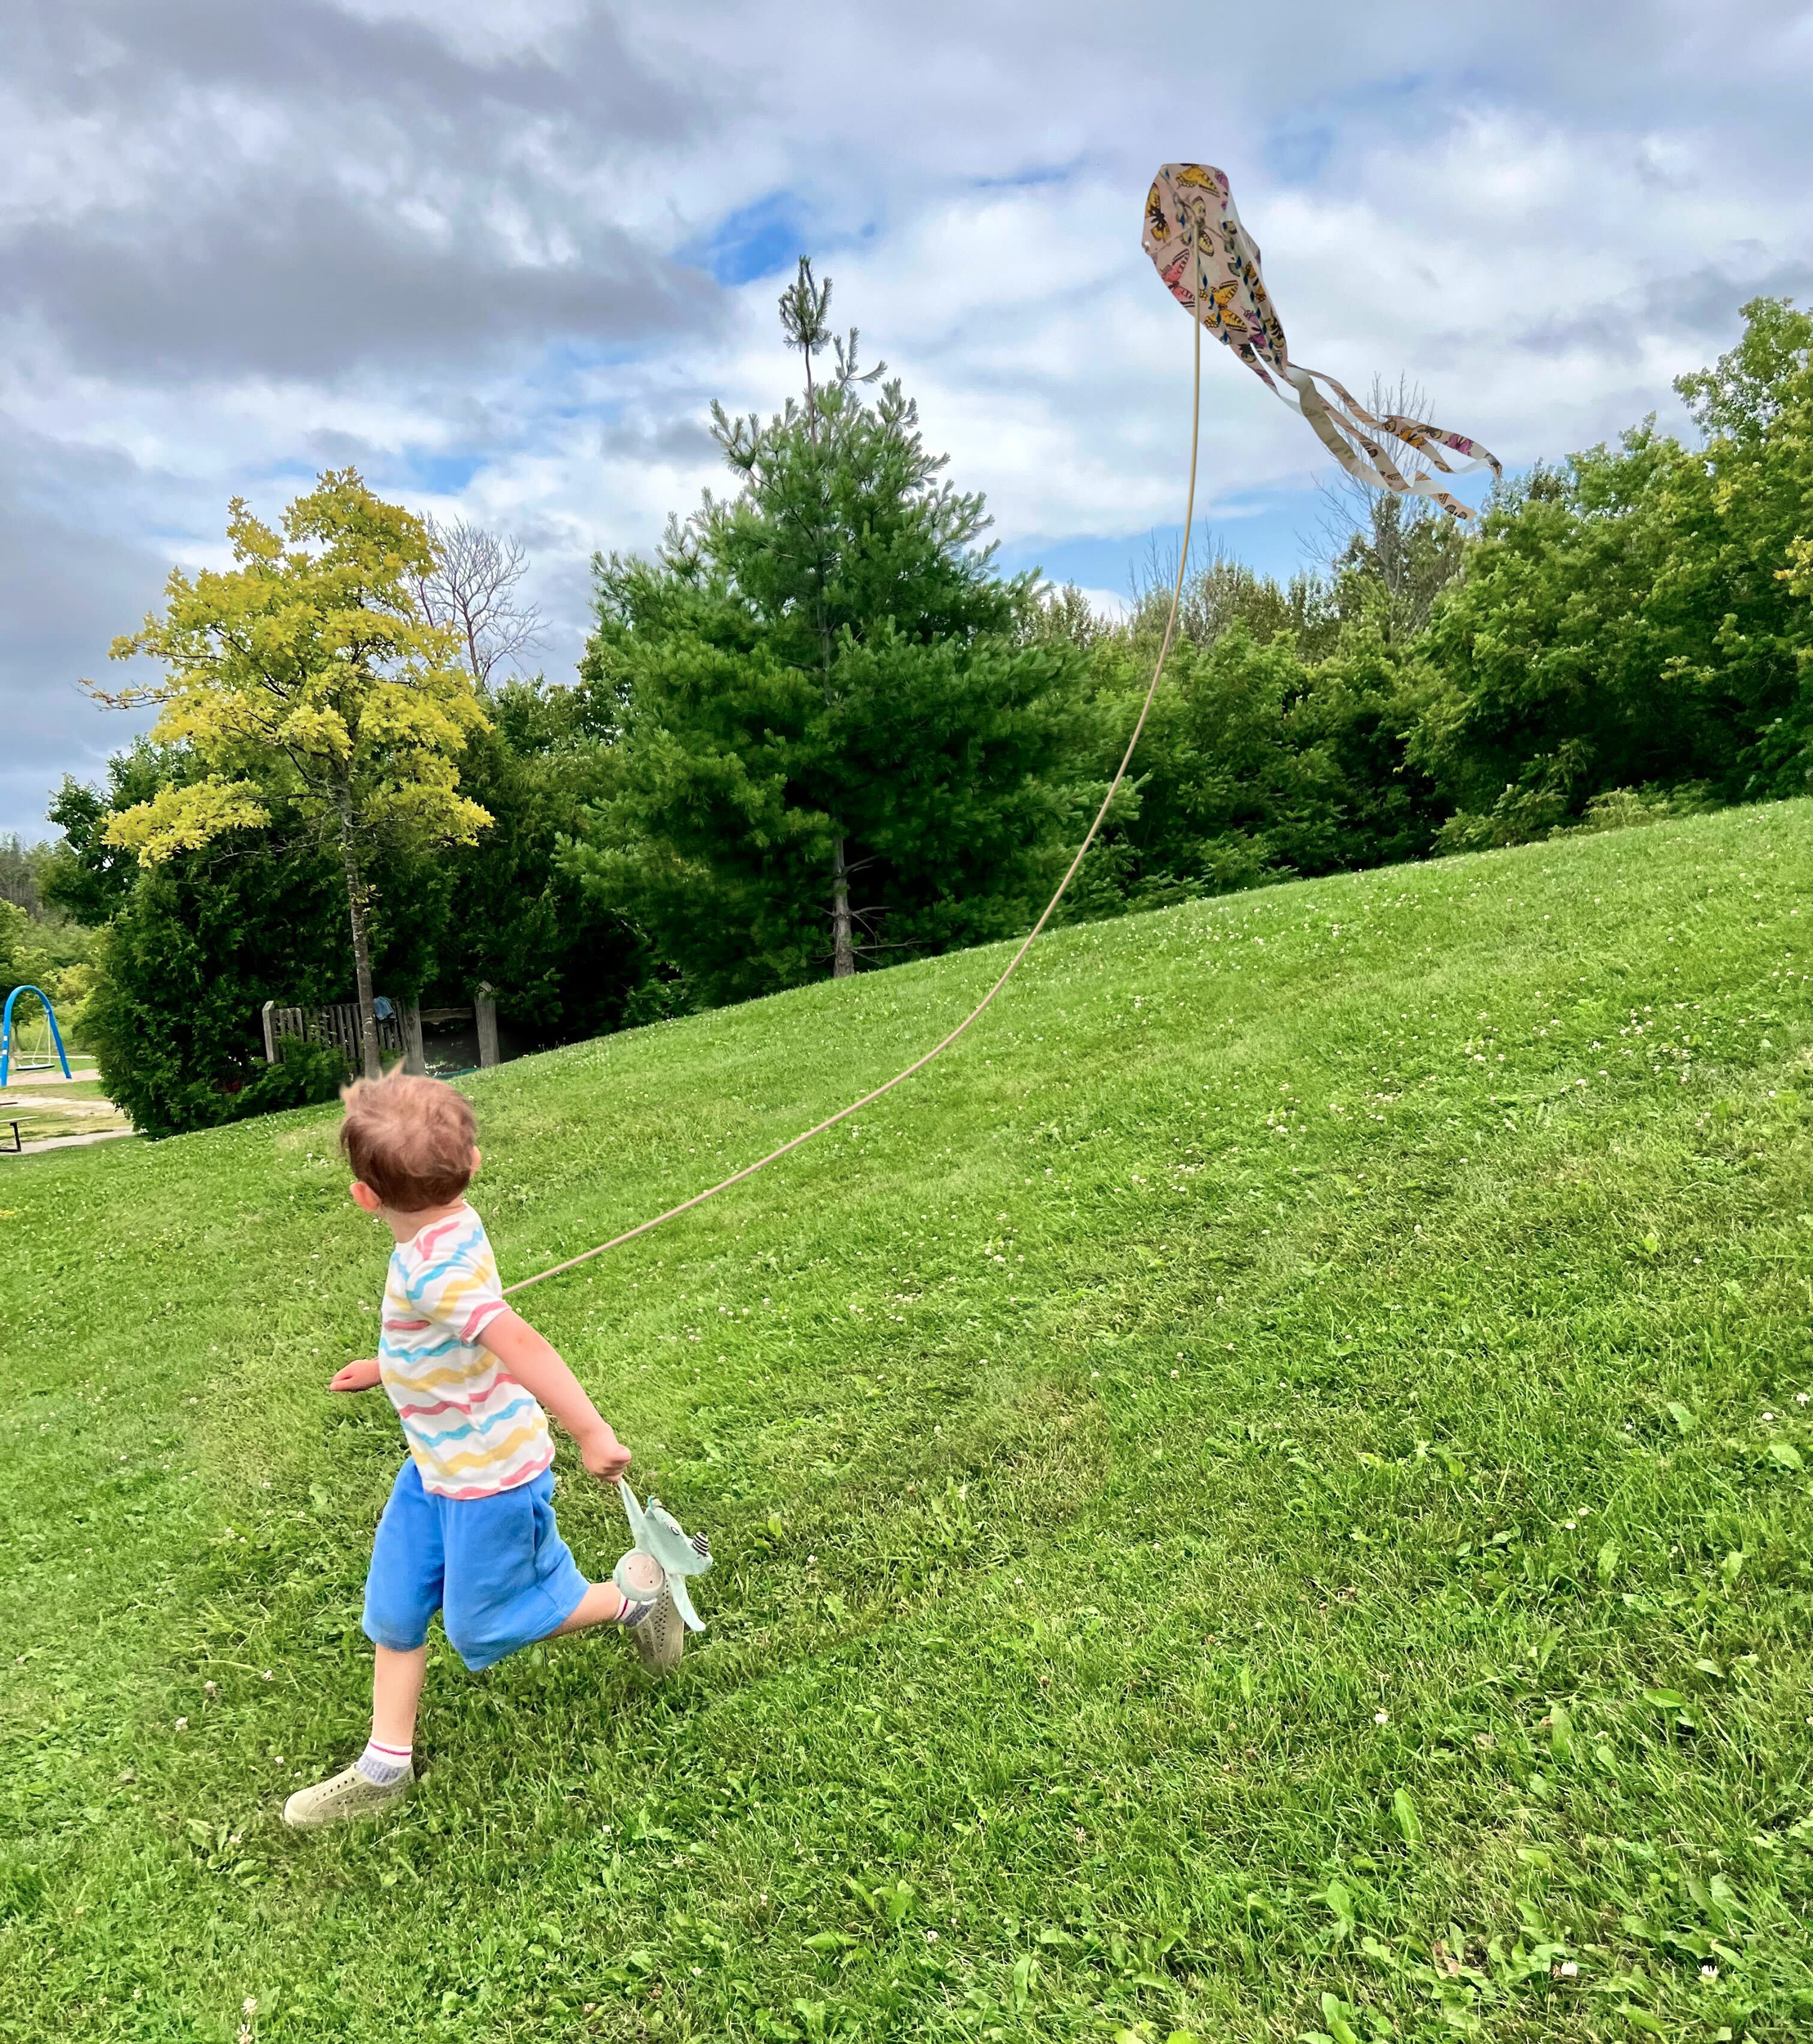
This simple 15 minute craft provided Ollie and I with fun, laughter and gratitude for how beautiful and welcome the wind can be!
About the authors
-

Shannon Herrick
Sparkle Crafts BloggerShannon is a farmer, writer, mixed media artist, photographer, and dreamer, navigating the wilderness of modern life from a Little House in the Young Woods of southern Vermont.
-
Trish Montle
Creative Content ManagerTrish is a social media manager, creator, copywriter, and mother of two small humans and three fur-babies. She lives in Collingwood, Ontario (Canada) surrounded by the natural beauty of the Blue Mountains and Georgian Bay.
