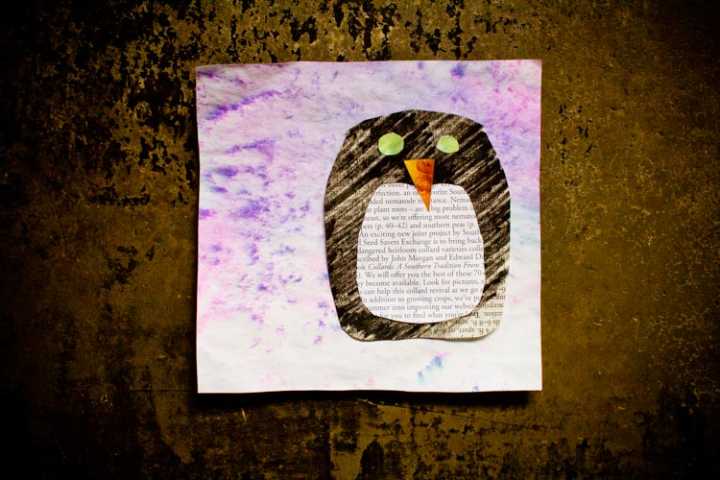
sparkle craft: mixed media penguins
In this week's The Willowbee Tree story, “Playing With Nothing,” Piper and Clancy have a snow day from school, but instead of a day of snowy fun outdoors, they must stay indoors due to the wind and cold temperatures. They quickly get tired of their usual games and books, and they moan that they don't have anything to do.
But then, the Willow Tree invites them to the barren Penguin Island off the coast of Namibia, and they learn from a group of penguins that one can have fun even when you're are surrounded with what looks like nothing.
Isn't that just the story of a snow day sometimes? Like many parents, when the weatherperson says, “Snow tomorrow!” I always head to the store to stock up on staples. (Bread, milk, and chocolate!) But I often forget the extra entertainment that can be necessary when icy winds wuther.
If you find yourself in a similar situation, this project—inspired by Piper and Clancy's visit with the penguins—has your back. Literally, all you need to pull off these adorable, mixed media “penguin portraits” are markers, drawing paper, glue, and a few things from the trash.
And the markers are negotiable! In the materials list, I suggest a few substitutes if you're really stuck at home and strapped for art supplies. With a little creativity, you absolutely can make art out of almost nothing.
Mixed Media Penguin Portraits
Materials
Markers (or watercolors or food coloring)
Plastic lid from a take-out container (or a plastic zip top bag or the flat bottom of a plastic tupperware container)
Drawing paper
A spray bottle (if you don't have one, you can just use your fingers to spritz water)
Newsprint/magazines
Scissors
Glue
Directions
Use the markers to color on top of the plastic lid. This is going to eventually be the arctic sky behind your penguin, so pick colors accordingly.
Working quickly before the marker starts to dry, lightly spritz a piece of drawing paper with water. Then, lay the lid (marker side down) on the paper and smush the lid around to deposit the color. Repeat the process if you need to until the backdrop is as saturated as you'd like, then set the paper aside to dry.
Use a black marker to color a small portion of the newsprint. Cut a small oval blob out of the black section. This will be your penguin's body. Cut a smaller oval out of uncolored newsprint. This will be your penguin's white belly.
Next, you will need to cut out a beak and two eyes for your penguin. If all you have is plain newsprint, you can color it with markers and cut shapes out, similar to what you did for the penguin body. If you have magazines—or a seed catalog full of vibrant vegetables, like I was using—you can cut the eyes and beak out of photos, collage-style.
Use the glue to layer the penguin together, then glue the penguin to your faux-watercolor backdrop, leaving just a little white “snow” at its feet. You can trim up the paper around the penguin if you'd like, or leave it as a larger vignette.
If you still have time to kill, give your penguin a silly name. Write or tell a story that imagines where its been and where it might be going. Look up what it might eat or be scared of.
See how much “something” you can make of nothing!
If you enjoyed this tutorial, here are others you might try:
Not yet a subscriber? Try a free trial HERE.
About the Author

Meryl Carver-Allmond
The Sparkle Kitchen Series is created by Meryl Carver-Allmond.
Meryl lives in a hundred-year-old house near the prairie with her sweet husband, two preschoolers, one puppy, one gecko, and about ten chickens. While she's been writing since she could pick up a pen, in recent years she's discovered the joy of photography, too. She feels lucky to be able to combine those skills, along with a third passion — showing people that cooking for themselves can be healthy and fun — in her Sparkle Kitchen posts.

