Sparkle Craft: Clothespin Race Cars
In the Dry Gables: Hands Together story “When Wide is Not Enough,” Jane Meyer, the Dry Gables pony express rider, has seen the future! When she returns from Rapid City after seeing her first automobile, she calls for the town to take the plunge and invest in one — right away.
Members of the town enjoy her enthusiasm, but they are skeptical about her reasoning: how do these automobiles work? Are they expensive? Is this a fad? With the advice and help of Max Denken, Jane does the hard work of researching everything she can about automobiles, and — through the process of going “deep” with the initiative — learns a lot about herself.
Perhaps it's because our family just finished our first season of pinewood derby, but I can readily identify with Jane's deep dive into learning about cars. What makes them go faster? Is aerodynamics important? Or is it all about weight? The research and reading and testing is fascinating.
This week's craft project is less all-encompassing, but it will help you and your small ones at least get the flavor of making and testing a car.
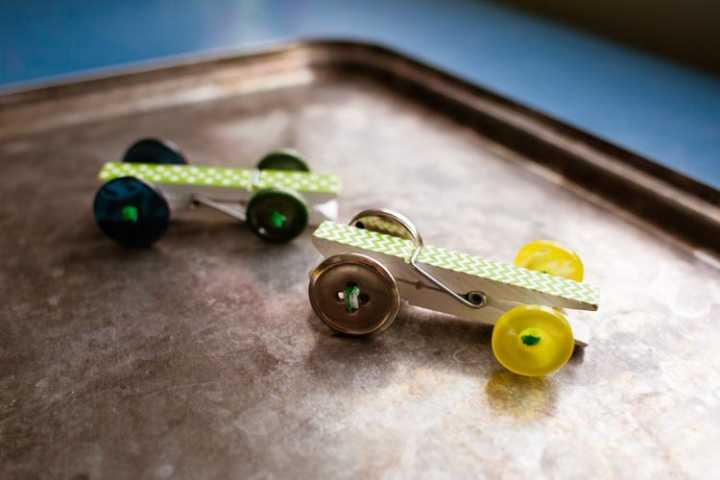
These clothespin race cars can be put together in an afternoon — the longest step is waiting for the glue to dry on the rear axel — so they make a great introduction into the experimentation that goes into making a larger car. Try them with different sized wheels. Experiment with driving them on different surfaces. Set up a cardboard box ramp for them to slide down. Race them against each other.
In short, put them together, then see what you can learn!
Clothespin Race Cars
Materials
(The materials listed will make 2 cars, but feel free to double or triple them if you want to make more.)
4 sets of 2 matching buttons (8 buttons total)
4 twist ties
1 straw
2 clothespins
Glue
Directions
Begin by threading one end of a twist tie through two of the holes of one button. On the back side of the button, twist the threaded end together with the longer tail of the twist tie.
Next cut a piece of straw just a little wider than the width of a clothespin. Put the piece of straw into the clamp part of the clothespin, then thread the long tail of the twist tie from step one through the piece of straw.
Thread the matching button onto the remaining tail of the twist tie, threading and trimming the tie so that the button “wheels” have just a bit of clearance on either side of the straw “axel.” When you've got the length just right, again, twist the ends together on the back side of the button.
Now, cut another piece of straw the same size as the first. Using glue (super glue is faster here, but white glue is fine, too) attach the straw inside the other end of the clothespin, as close as you can get to the spring without compressing the straw. Allow it to dry completely before you go on to the next step.
Once the glue is dry, thread another matching pair of buttons onto a second twist tie, inserting the twist tie through the piece of straw, just as you did with the first set of wheels.
Repeat these steps for the second car — and happy experimenting!
About the Author

Meryl Carver-Allmond
The Sparkle Kitchen Series is created by Meryl Carver-Allmond.
Meryl lives in a hundred-year-old house near the prairie with her sweet husband, two preschoolers, one puppy, one gecko, and about ten chickens. While she's been writing since she could pick up a pen, in recent years she's discovered the joy of photography, too. She feels lucky to be able to combine those skills, along with a third passion — showing people that cooking for themselves can be healthy and fun — in her Sparkle Kitchen posts.

