Nature School Project: Weaving with Nature
In this week’s Martin and Sylvia’s Nature School story, “Song of the Hermit Thrush: Part Two,” Martin and his group bring their song to the closing ceremony of Goose-eye Wilderness School. He sees the altar that the Hummingbird Clan built, tastes the tea that the Crow Clan concocted, listens to the story that the Mockingbird Clan tells — and then leads the entire group in the closing song. It is a sweet, emotional, and deeply gratifying event — and when he has some time with his Deermice friends, he comes to realize that though he learned a great deal about the natural world throughout the year at Goose-eye, he learned even more about himself.
As I listened to this story, I envisioned a piece of yarn connecting each camper to the other, weaving back and forth as they interacted with one another. The campers of Goose-eye spent all year weaving a connection between the members of their group and eventually between members of other groups. What could be more perfect to represent this connection than a nature weaving?
I used sticks from our backyard and wool yarn to create a weaving that can decorate our tree or our nature table. I used various shades of yellow because of the summer solstice coming up. You can choose whatever colors you wish. I also included some beads choosen by each member of our family. We put a “good-will wish” on each bead as I worked them into the weaving.
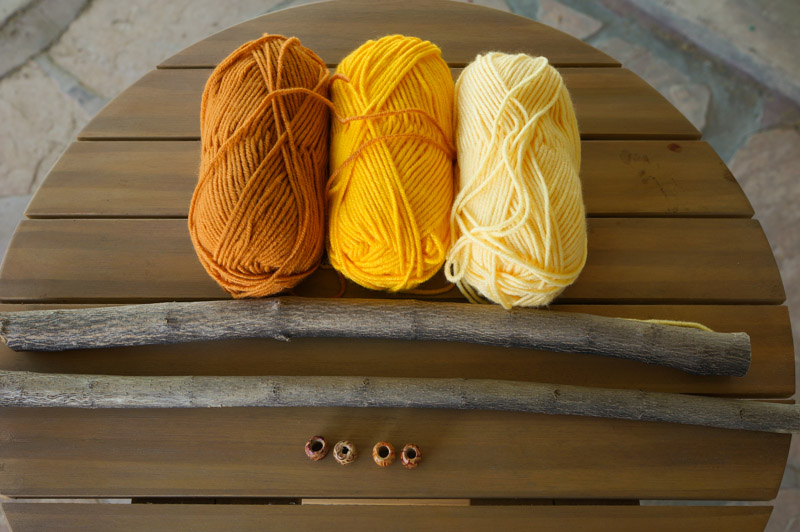
Materials:
- Small branches
- Yarn of various yellows (or colors of your choosing)
- Beads
- Scissors
How To:
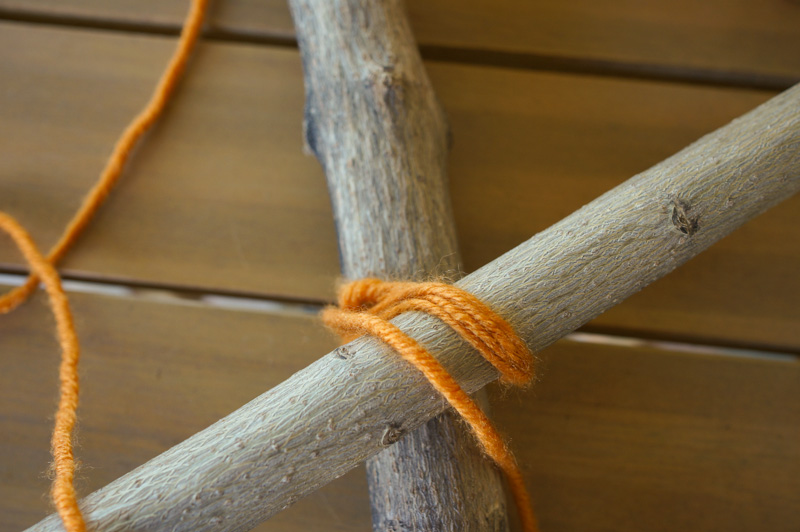
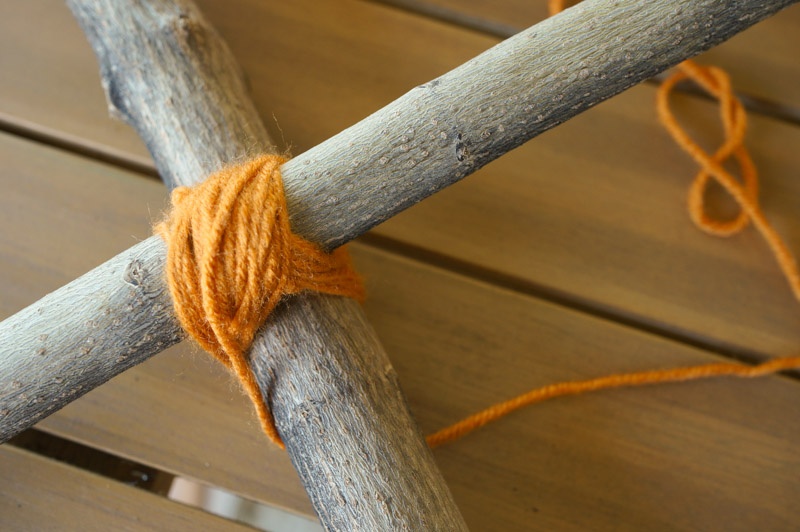
Start your weaving by laying one stick across the top of the other. Then wrap the yarn across in one direction, about twenty times. Then switch, and wrap in the other direction twenty times until the sticks feel sturdy and remain in an “X” shape when set down.
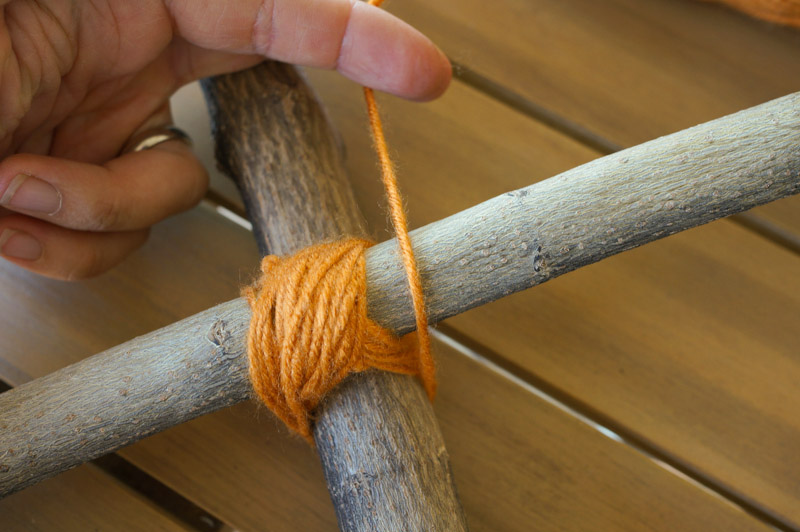
Now is the part where you will begin to weave the yarn over and around each stick. To help your children, your can sing a little song:
“Over the bridge, under the log, over the bridge, under the log.”
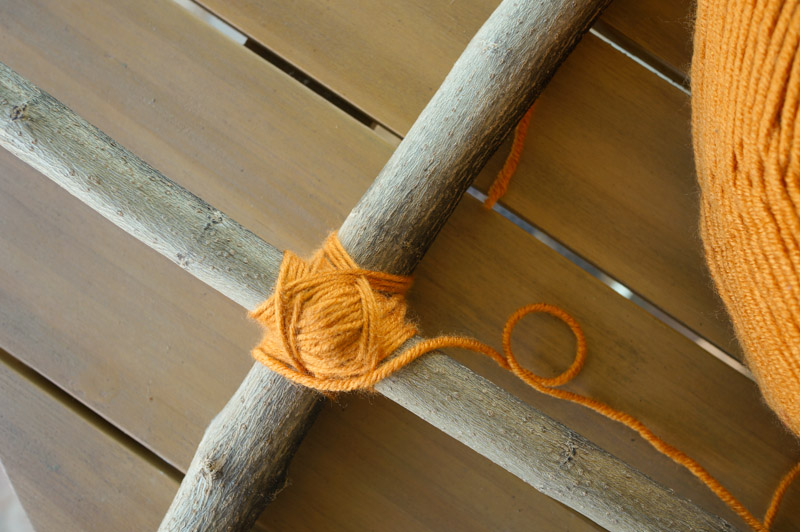
Starting from the back, bring the yarn up and cross it over one stick and then wrap it around that same stick. Then bring the yarn over to the left (you’ll move in a counter-clockwise direction) and cross it over the the stick, wrapping the yarn around the stick again and continuing around and around.
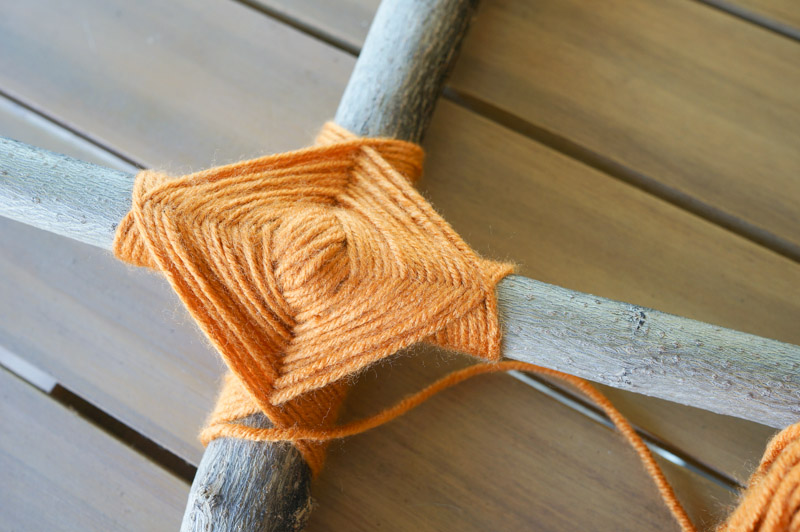
When you have progressed far enough, your weaving will begin to look like this.
At any point you can change colors or add beads. I used three colors of yarn and changed three times. Each member of our family chose a bead and decided where to put it.
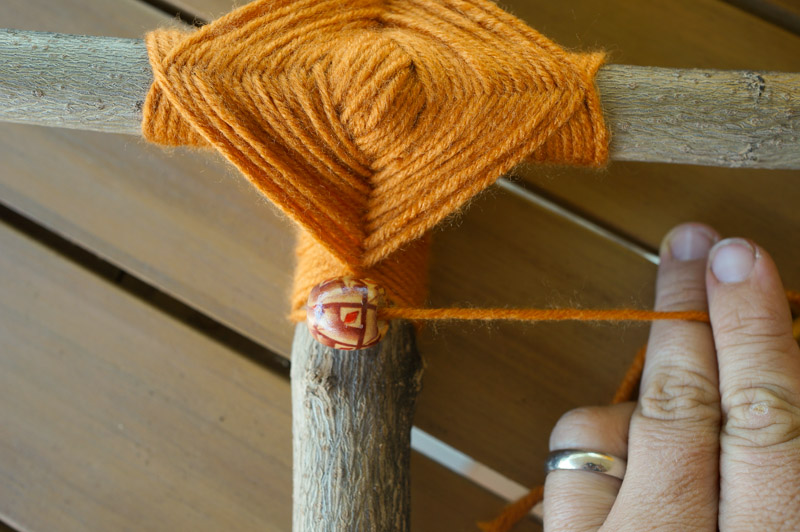
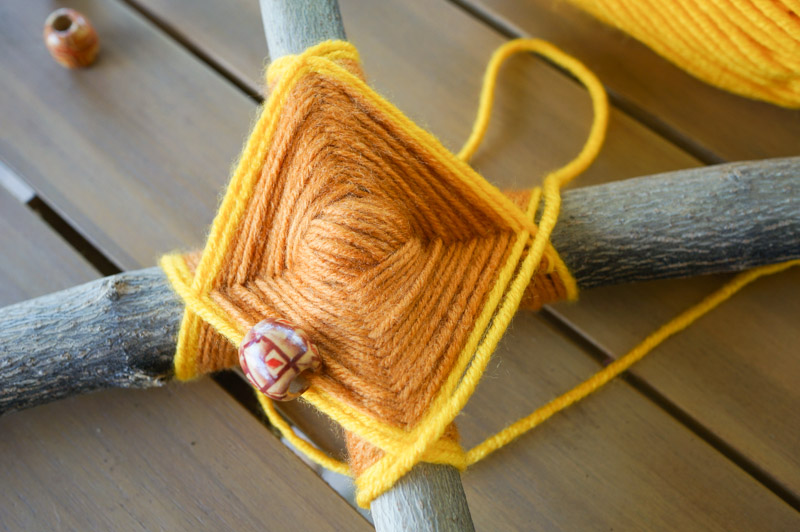
If you want to change color, simply cut the yarn and tie the old yarn to the new yarn, making sure to weave the knot to the back so that it won’t be seen. Inserting a bead at the color change is an easy way to get the beads woven in.
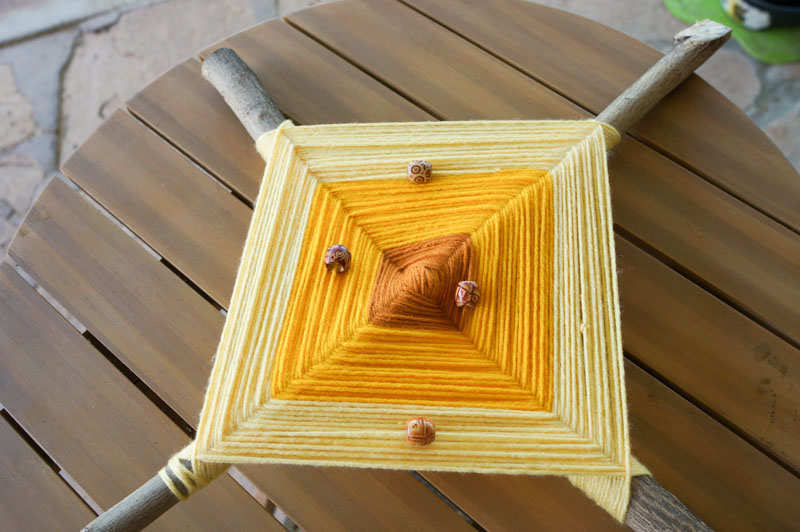
Continue your weaving until you reach the outer edges of the sticks. You can stop at any point you think it’s done.
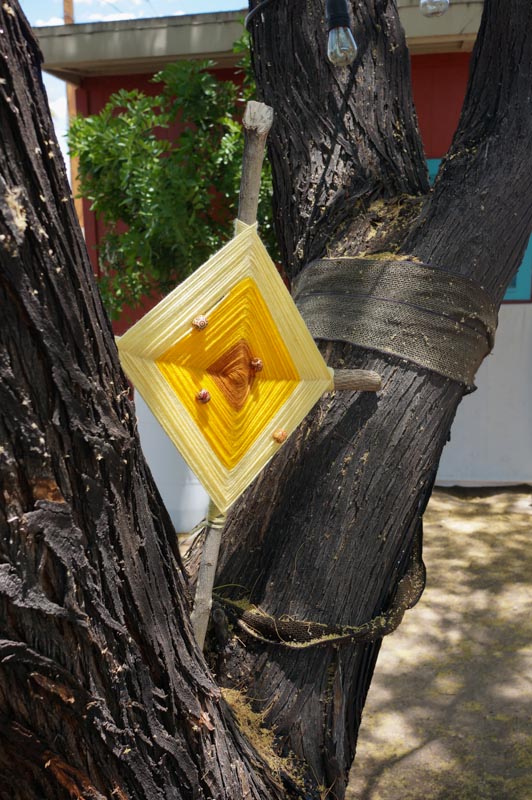
We hung ours in our big tree so we could see it all the time.
About the authors
-

KC Pagano
ContributorKC is a full-time radical homemaker and mama to two spunky little girls. She writes about all kinds of radical goodness, from gardening and cooking with whole foods to crafting, sewing, homeschooling, and mama musings. Read more on her blog [The Nettlesome Life](http://nettlesome.life/).
