Nature School Project: DIY Rain Gauge
In this Martin & Sylvia Nature School story, "Measuring the World", when Sylvia declares that she knows everything there is to know about her best friend, Sofia, Momma suggest she use the scientific method to test her theory. And what is the scientific method?
Momma explains that it involves measuring, collecting data, and then studying the data. Sylvia and Sofia then learn the difference between using the scientific method on rocks, plants, animals, and then… best friends.
My family lives in the desert of Arizona, and unlike Sylvia and Sofia, we don't see rain very often in the winter or spring. However, we get lots and lots of rain in the summer. So a rain gauge is perfect for measuring those afternoon monsoon storms.
Materials
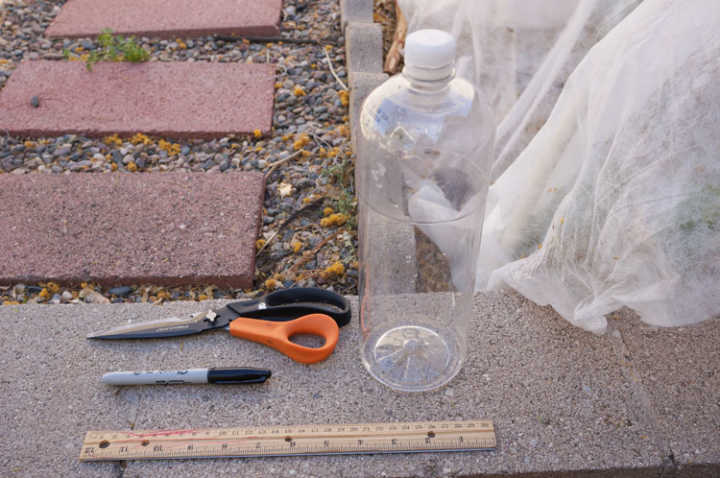
- plastic bottle
- scissors or box cutter
- sharpie marker
- ruler
How To:
Gather all your materials so you have them handy as you are working. Remove any lables from the bottle as needed.
Using the scissors or a box cutter, cut a hole into the bottle near to the top and then continue to cut, turning the bottle until the whole top comes off.
When you have cut the top off the bottle, remove the cap, flip the top upside down, and insert it into the bottle, creating a funnel.
Place the ruler with the number one at the bottom and mark all the way up the bottle in either inches or centimeters. (For the sake of science, we used both.)
Now your rain gauge is ready to use. I placed our rain gauge on my garden's potting table. We had micro burst of rain the other day and got a centimeter of rain.
If you want to take your scientific explorations to the next step, you can try charting the rainfall at your house over a period of a month or more.
Happy Measuring!
About the Author

KC Pagano
KC is a full-time radical homemaker and mama to two spunky little girls. She writes about all kinds of radical goodness, from gardening and cooking with whole foods to crafting, sewing, homeschooling, and mama musings. Read more on her blog The Nettlesome Life.

